Providing a contact form on your WordPress website is a good way to allow your visitors to communicate with you. There are plenty of plugins for WordPress which allow you to add a contact form to a website’s page; here we will teach you to do this using Contact Form 7.
How to Add a Form in WordPress
Step 1: To begin, login to your WordPress Dashboard
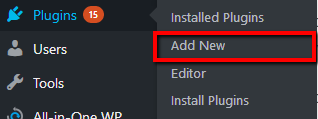
Step 2: Navigate over to ‘Plugins’, then ‘Add new’ and look for a plugin named ‘Contact Form 7’.

Step 3: Click on ‘Install’ and then click on ‘Activate’ to install and activate the plugin so that you may use it.
Step 4: Click on ‘Contact’ on the left side of your WordPress Dashboard menu panel. Contact Form 7 comes preconfigured with a form you can already use and, if you would like to use a basic form, just copy the code at the top of the form.
You can change the place the emails are going to be sent by simply changing the email address below the Mail section in the ‘To:’ heading.
Step 5: Simply paste the code below into a post, page, or text widget in which you want the form displayed on and then click on ‘save’ or ‘update’
[contact-form-7 404 “Not Found”]

Step 6: The next time you visit your site you should be able to see your form displayed where ever you posted the code from above.
This should be everything you need to know about adding a form with Contact Form 7 in WordPress.