Let’s learn Clearing WordPress Cache in complete step by step guide. If you are making changes to your WordPress site, and those changes are not appearing on the updated page, it might be because you have to clear your cache. Your caching plugin could still be showing the cached version of your page, the one without the changes. For this reason, when you have been using a caching plugin to speed up WordPress, you may want to clear out that cache regularly.
To solve the problem, and make your WordPress site show the latest changes instantly, you could just delete the cache. This can be done in either W3 Total Cache or WP Super Cache.
Clearing WordPress Cache: A Complete Guide
To clear your WordPress cache, just follow the steps below.
before going into details; check what we have already covered on WordPress and its speed;
- How can I setup WordPress rewrite on Nginx?
- How to create a WordPress optimized VPS with DreamVPS console
- speed up WordPress with Redis Caching
W3 Total Cache
In the case of W3 Total Cache Plugin for WordPress, you can clear your cache like this:
Step 1: Log into the WordPress Dashboard
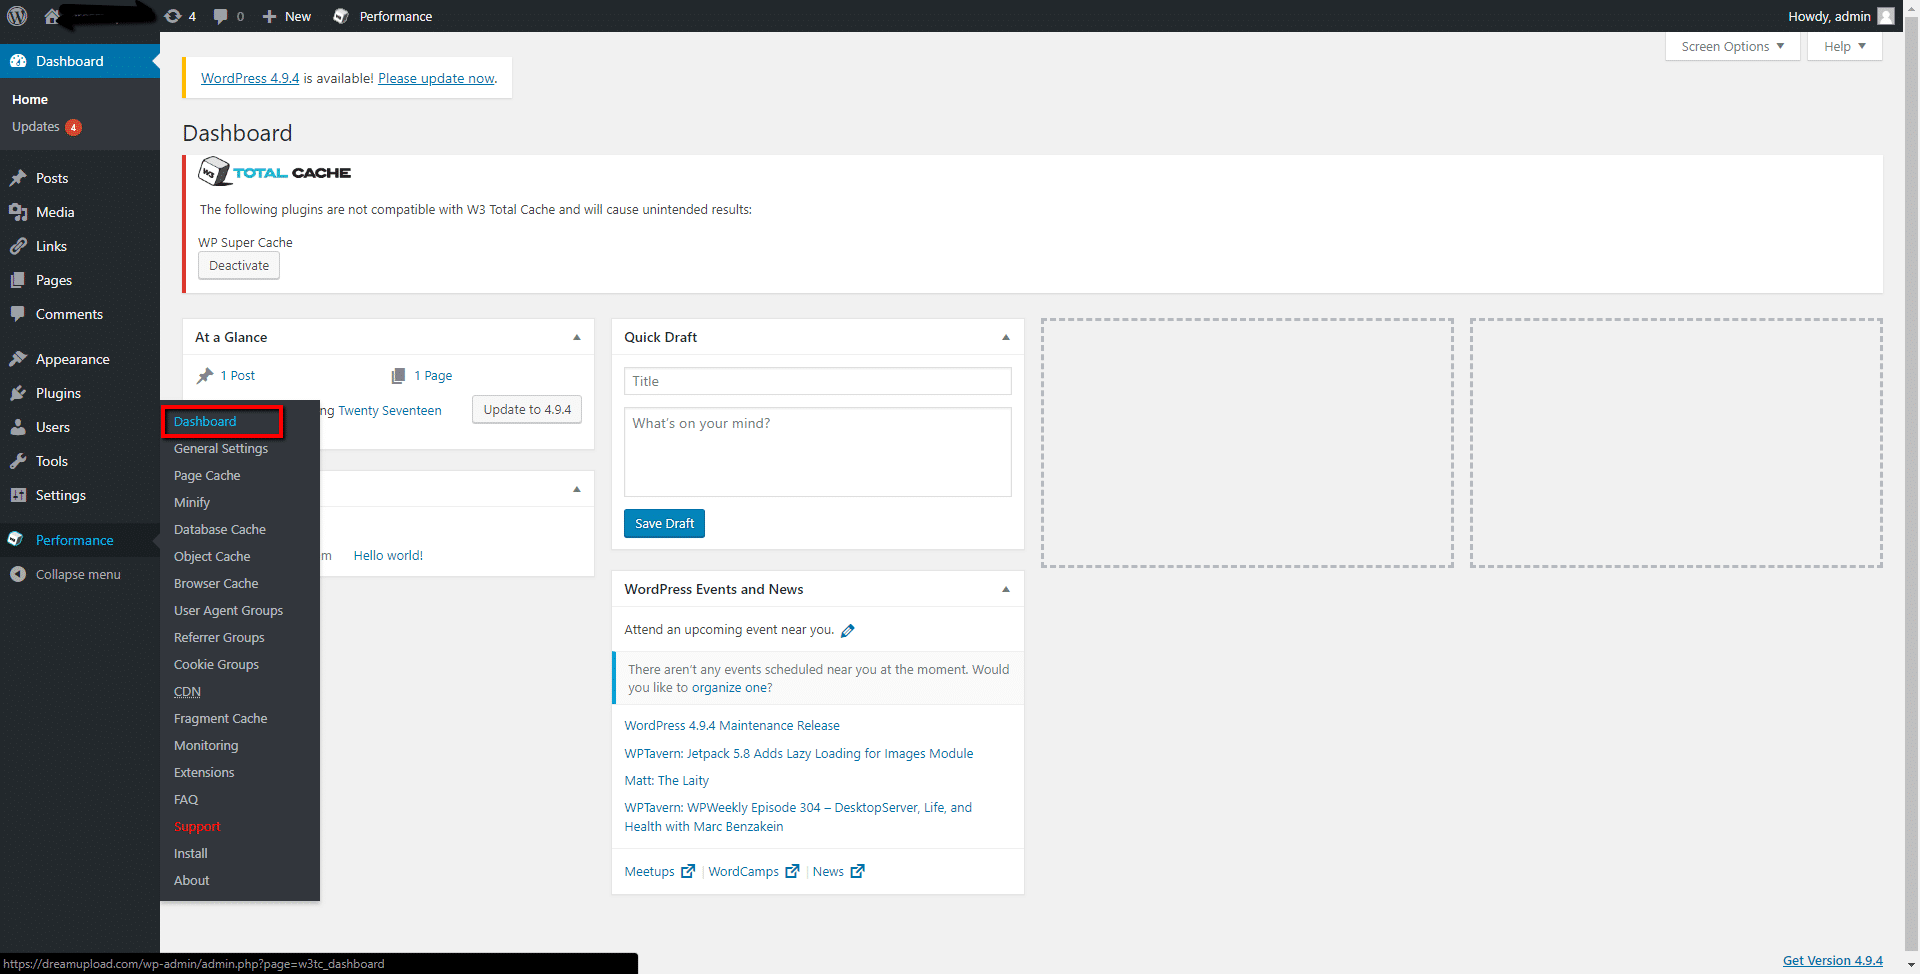
Step 2: Hover your cursor over ‘Performance’ and a list will show up. You should then click ‘Dashboard’.

Step 3: Once you’re at the dashboard, click on ‘Empty all Caches’.

In the case of the WP Super Cache plugin, you can clear your cache like this:
WP Super Cache
Step 1: Login to your WordPress Dashboard
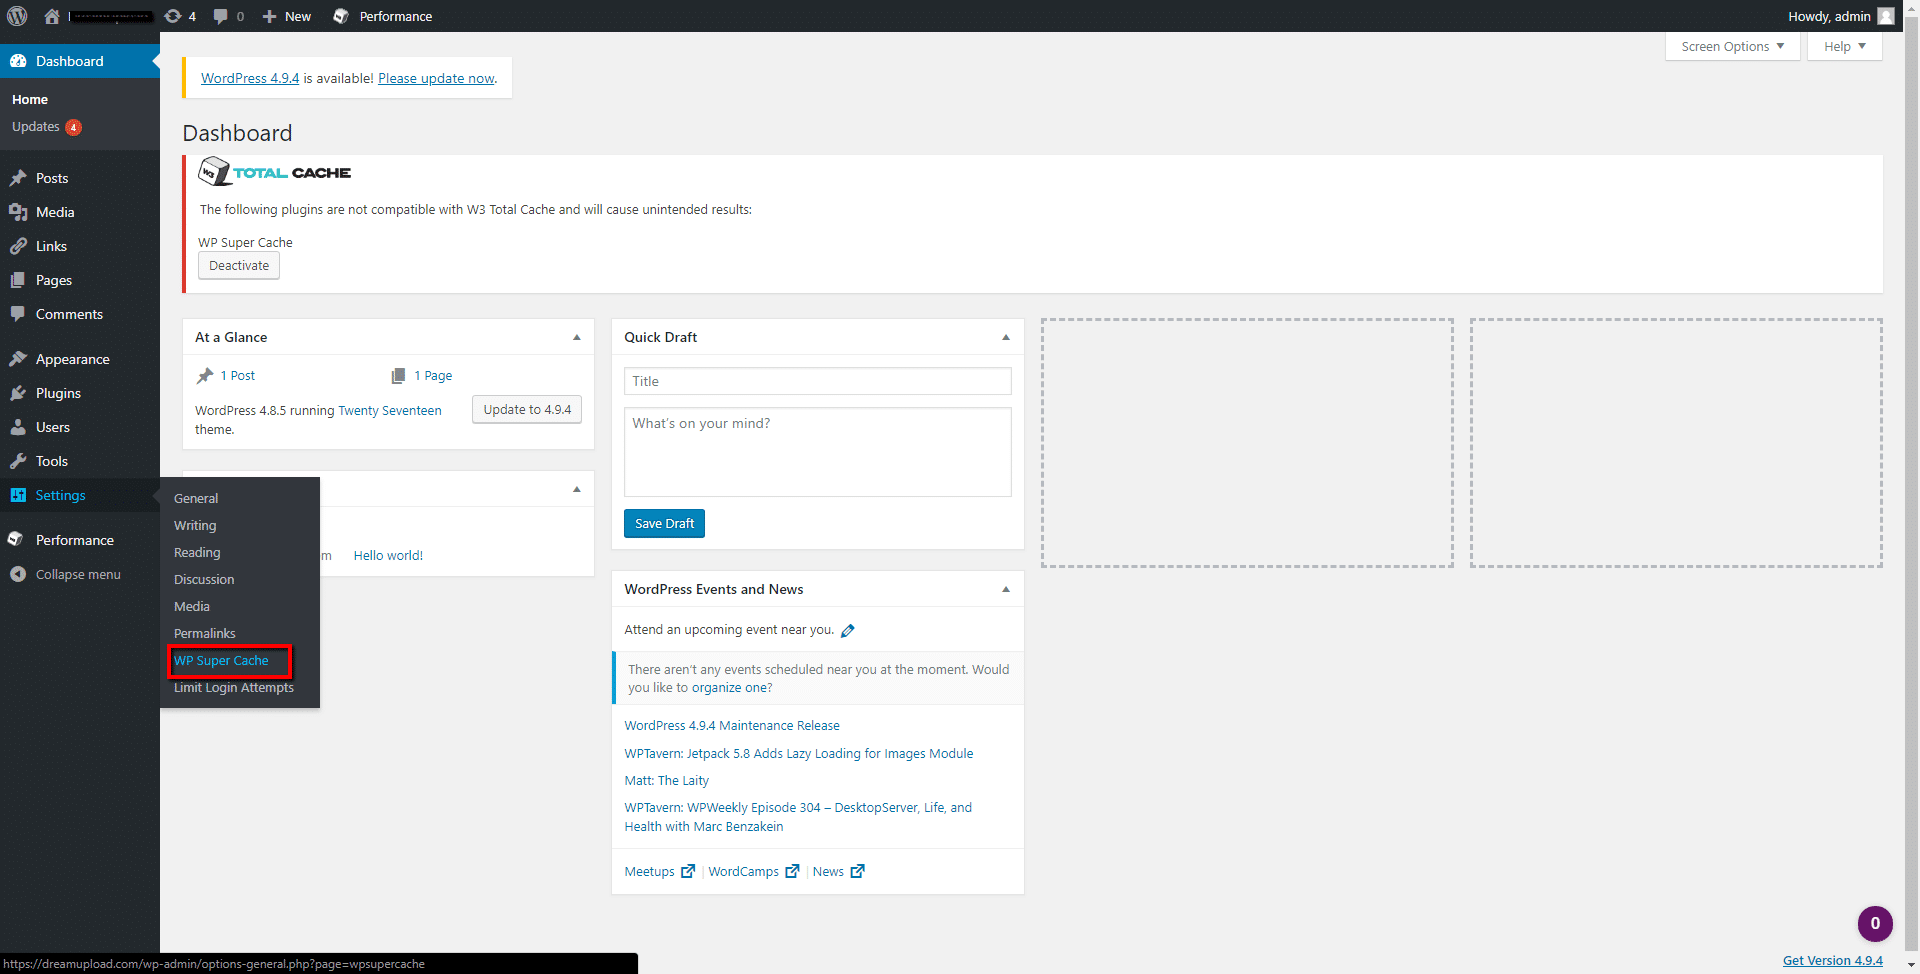
Step 2: Hover your cursor over ‘Settings’ and a list will show up. You should then click on ‘WP Super cache’.

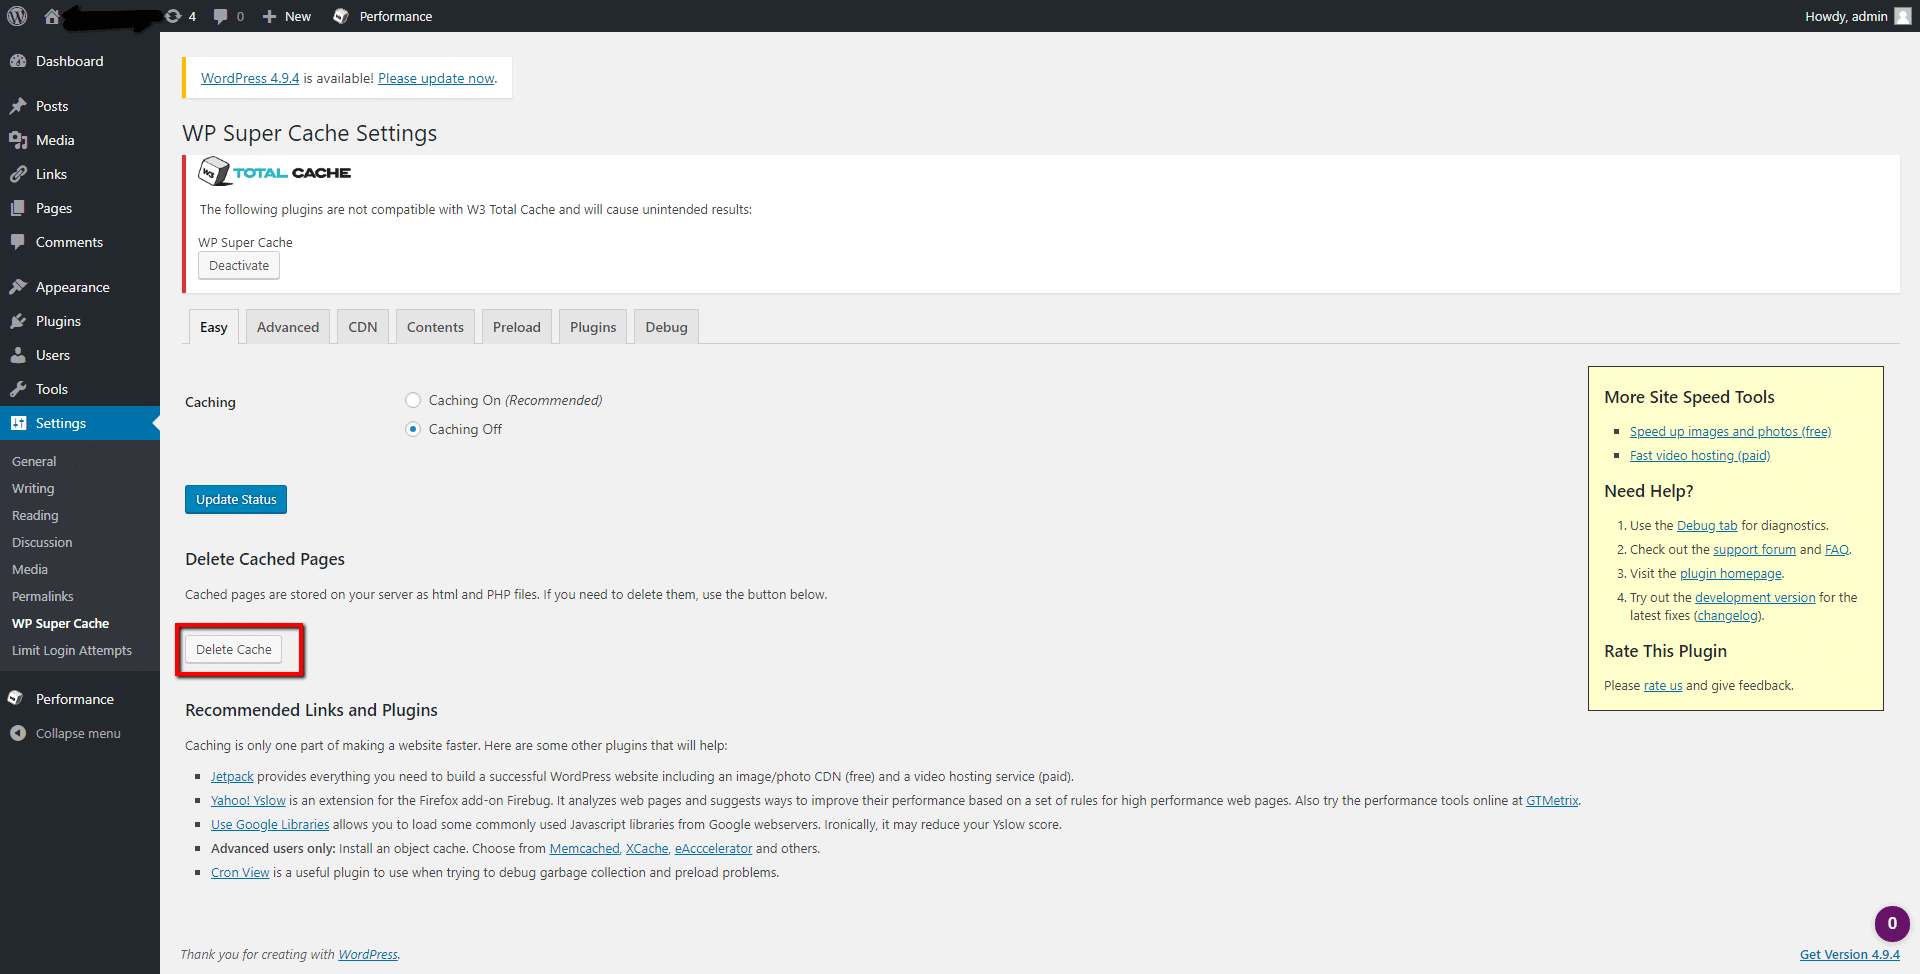
Step 3: Once you are at the WP Super Cache Settings page, click ‘Delete Cache’.

After you are done deleting, your WordPress cache, any recent updates that you have published will appear.
The caching plugin will then begin caching the latest version of your page once the site is visited.
Do let us know if you want to add any specific Linux or WordPress CMS topics into our tutorial series.