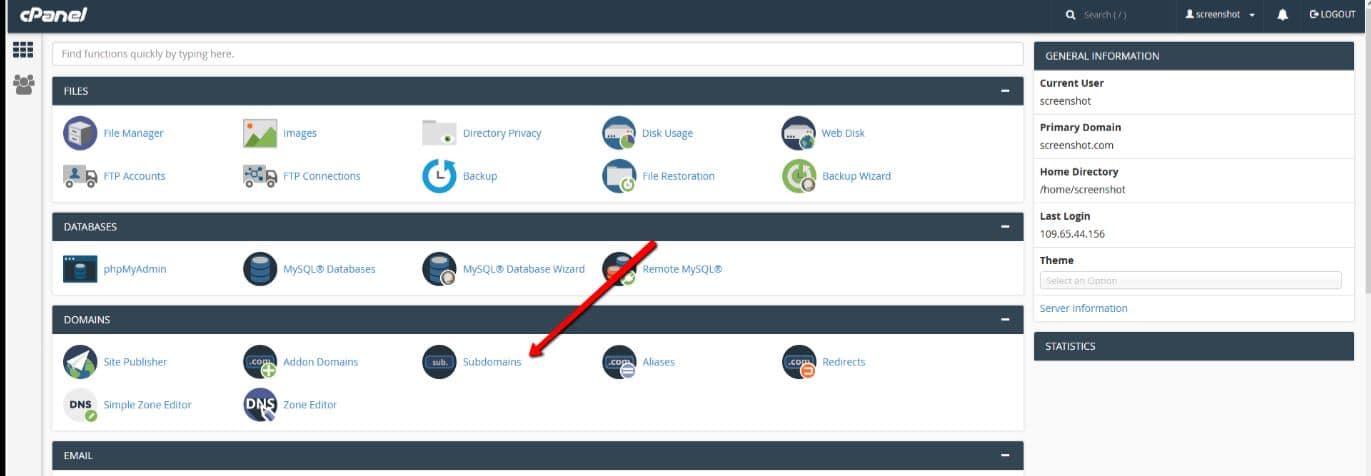
A New Day! let’s learn how to create subdomain in cPanel. In cPanel, you should have the option to create what is called a subdomain; a subdomain works separately from your main domain and can be useful for a number of website additions such as a Mobile version of your site, a forum, a blog, or even a store.
Here’s an example: If you were to add a forum to your site, you can create a subdomain named “forum” that would lead a person straight to that area of your website. Your website’s address, with the new subdomain added, would be “forum.domain.com”.
Also, here we have a few hand-picked guides that you must read next:
cPanel allows you to create new subdomains with ease.
To set up a subdomain, just follow the steps below.
Create Subdomain in cPanel
Step 1: Log into your cPanel.
Step 2: Navigate over to the ‘Domains’ area and then click on ‘Subdomains’.

3rd Step : Fill in the name you choose for the subdomain and then choose the domain to create it under. This should automatically create a folder for that subdomain in your ‘public_html’ folder.

Step 4: Click the ‘Create’ button. After this, you will see a message which states that your subdomain has been created.
These are all the steps you’ll need to know in order to add your first subdomain.
Thanks
Do let us know if you want to add any specific Linux VPS hosting or Windows hosting topics into this tutorial series.