A New Day! A new tutorial.
Check out Our Best VPS Hosting and WordPress hosting for scaling your cloud-based applications and processes:
WordPress optimized VPS with DreamVPS console
Here, we have detailed tutorial on How to create a WordPress optimized VPS with DreamVPS console:
Step 1 – Registration
Register using your email account and choose a secure password for your account:

Step 2 – Log in to VPS console dashboard
You are now auto-redirected to the login page at https://console.dreamvps.com. Use the credentials that you used in the first step:

Step 3 – Email Validation process
DreamVPS will send you an email to verify your email ownership so you can proceed to the next step:

Step 4 – Email confirmation link
You will get an email that looks like the following, please click the link to complete verification.

Click continue or wait to be redirected automatically to your VPS dashboard:

Step 5 – Add your billing profile
Use the add billing profile button to update all of your personal details and credit card to allow payment for your services:

Fill in all your details on the following page:

Step 6 – Create your first server
After completing your billing profile, you will be allowed to set up a new server. Click on the button “create new server” to start the process of server creation:

Choose the continent of your preference and then choose data center location:

Choose a WordPress image from the list below.

Select your server specs according to your needs:

At the following screen, choose the number of servers, then type a server name and choose a billing mode (hourly / monthly) according to your convenience, and, finally, click the “Create server” button to get started:

Below, on the task queue, you can see the process of a new server creation that usually takes a few minutes:

Congratulations! Now that your server is ready, you can connect to the server by using the IP address that you see on your own created server:

Step 7 – Connect to your WordPress server
You can download your favorite SSH application to connect to your new WordPress server and start setting up your WordPress site. You can download putty here if you have a Windows PC or use your terminal if you have a Mac OS on your computer.

Following the open button, a new SSH console window will be opened in which you are required to type the user name root and the password that you have previously used to create the server (the password will not appear while you are typing it for security reasons). After typing the password, press Enter to see the following screen and start to set up your WordPress site.
Copy your password then right click while entering a password in order to paste it.

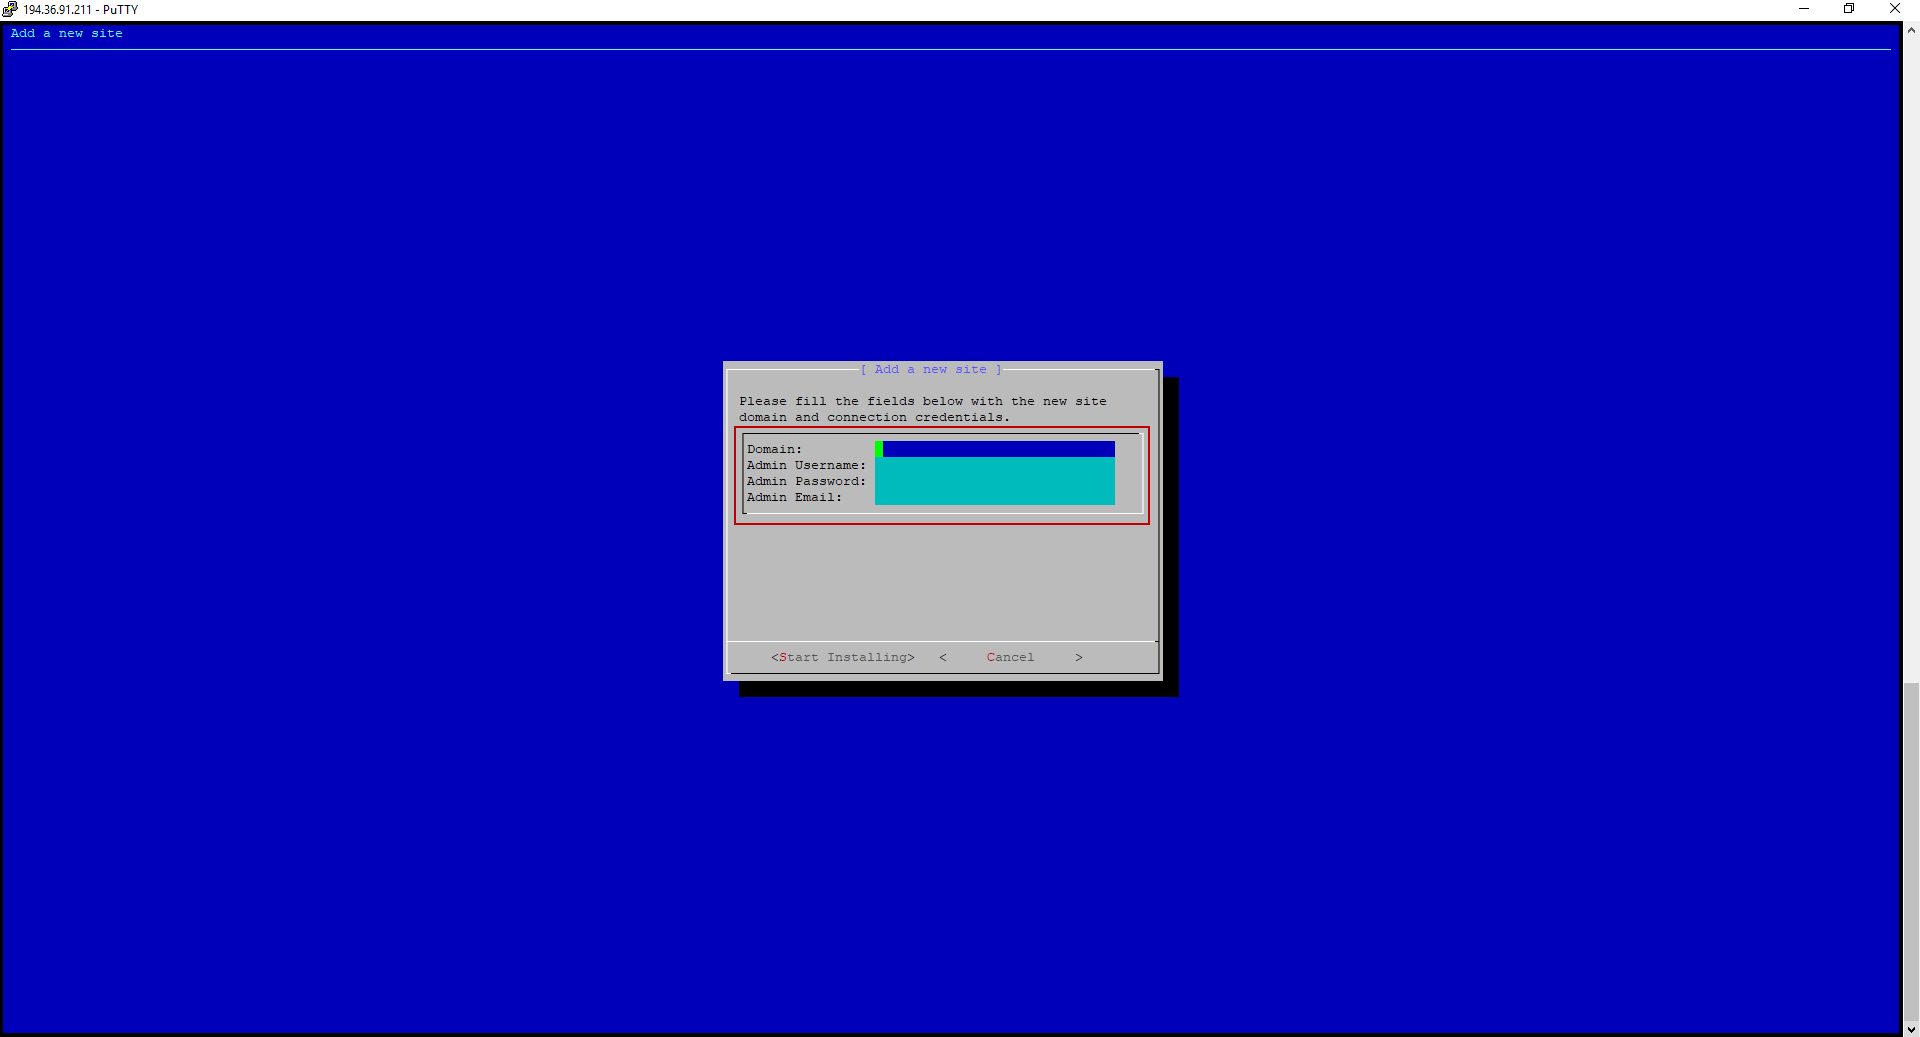
Then you will see the following screen and be able to choose the Add new site option to start your WordPress site:

Type in all the following details inside the input fields and click Start Installing

Step 8 – Create a DNS record
The final step will be to create a record using the server IP address from your domain DNS provider to point to your new WordPress optimized VPS.
Thanks
Do let us know if you want to add any specific Linux or Windows hosting topics into this tutorial series.