
In this tutorial, we will teach you how to find and install WordPress theme from inside the Admin Dashboard.
There are a huge number of Themes ready for you to use, helping you customize the look and feel of your WordPress site.
Check out Our Best WordPress hosting and VPS management services;
Installing WordPress Theme
1st Step: Log into the WordPress Dashboard.
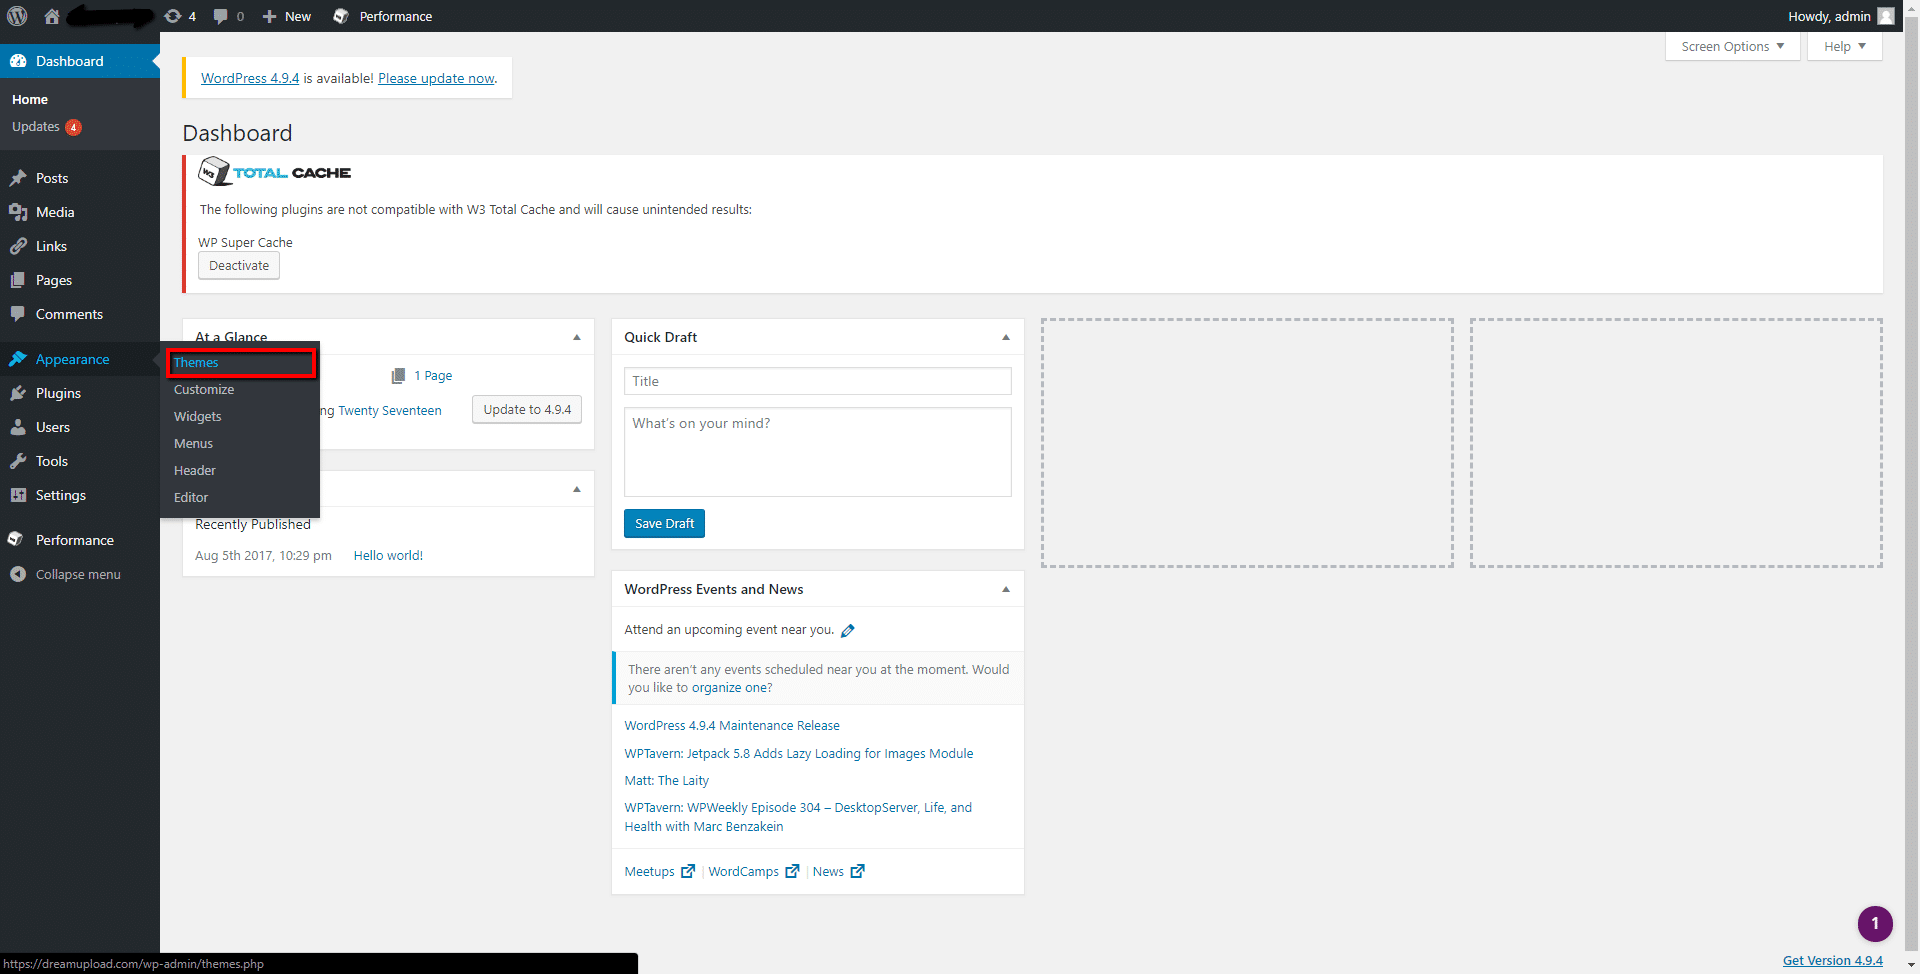
2nd Step : Click on ‘Appearance’ and then ‘Themes’.
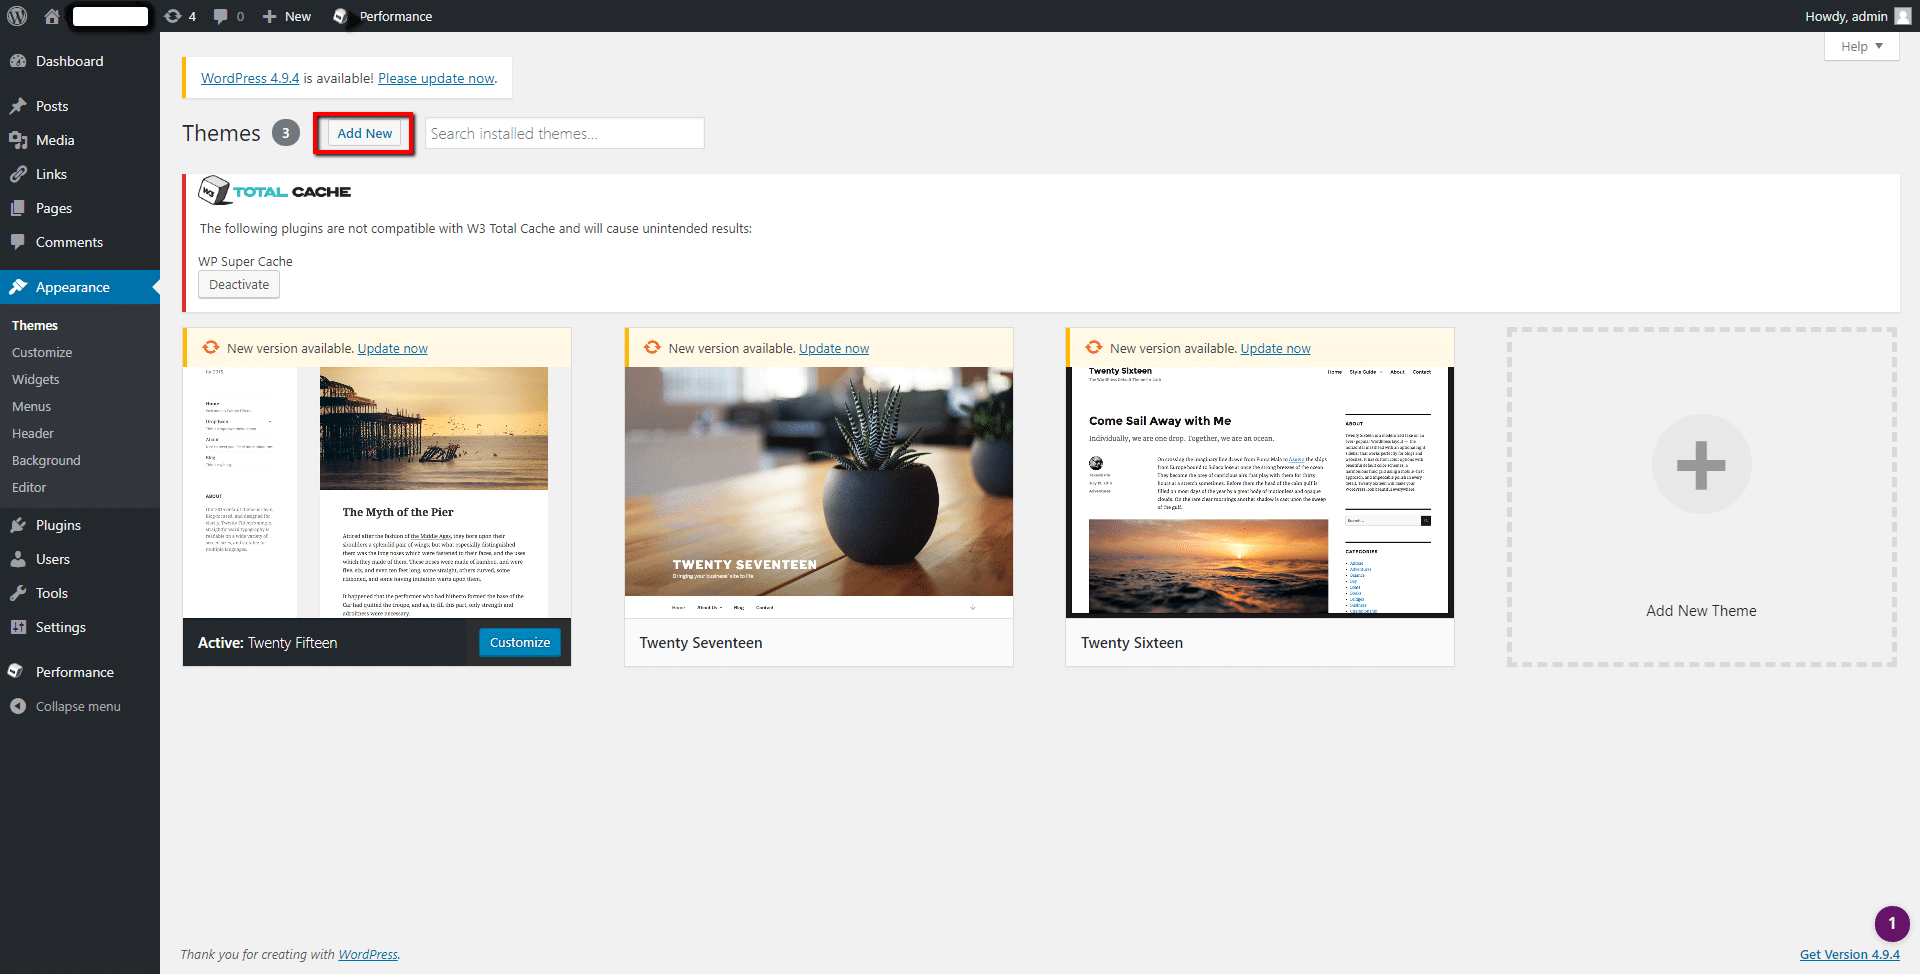
3rd Step : Next, click on ‘Add new Theme’.
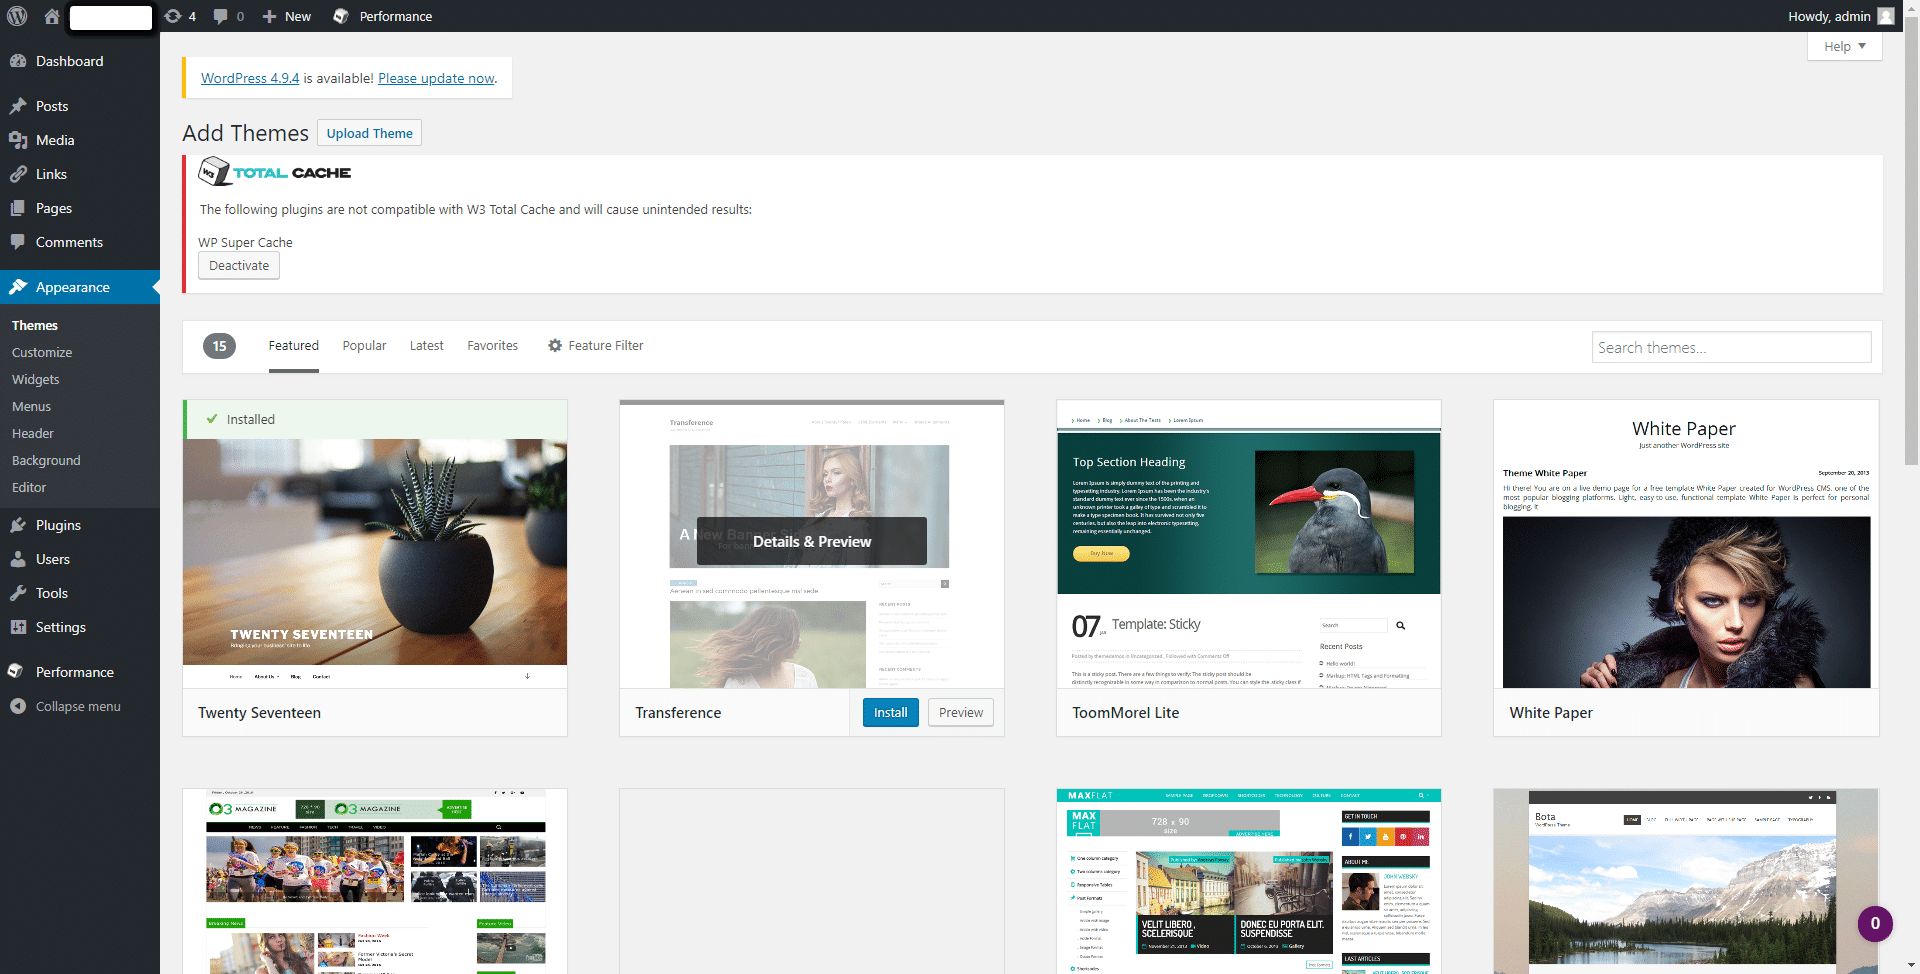
4th Step : Now you should see the ‘Features’ Themes displayed. Hover your mouse over the Theme before clicking on ‘Preview’ to try it out.
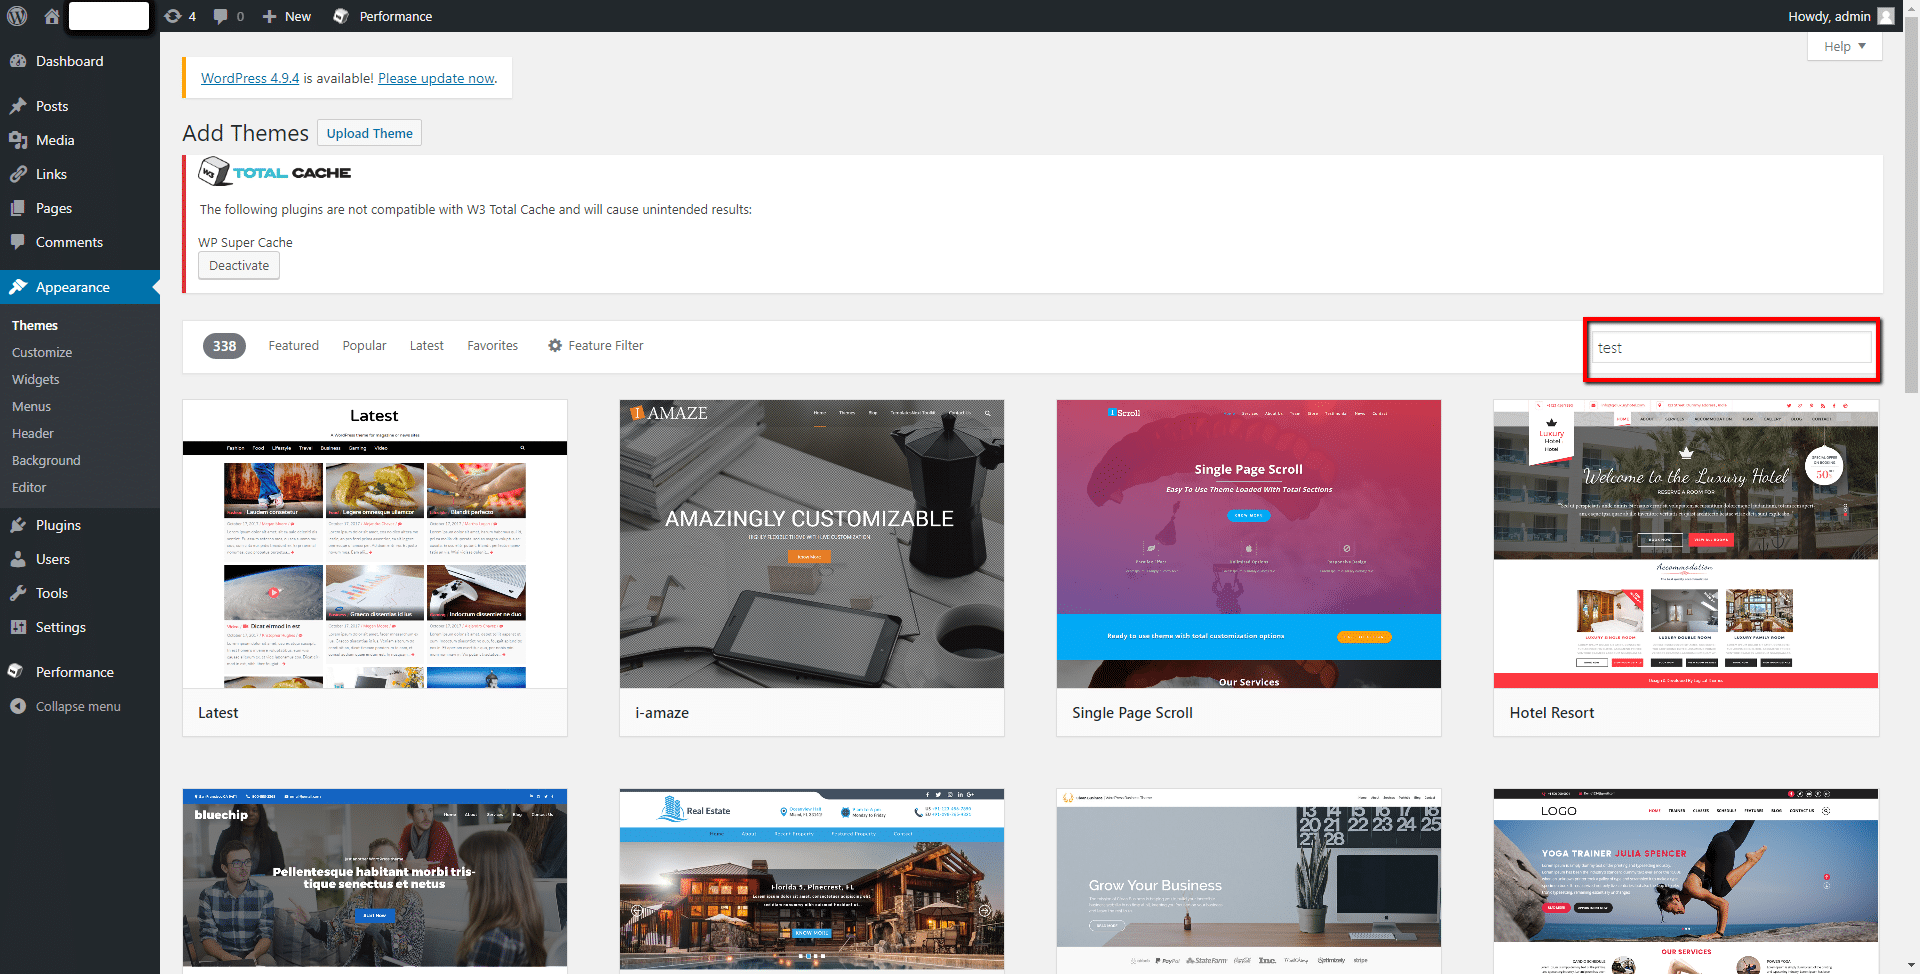
5th Step : You can look for more themes in the available box.
6th Step : On top you will see links to view ‘Popular’, ‘Latest’, and ‘Favorite’ themes.
7th Step : By clicking on the ‘Feature Filter’ you can choose to view Themes by the following: ‘Colors’, ‘Layout’, ‘Subject’, or ‘Features’.
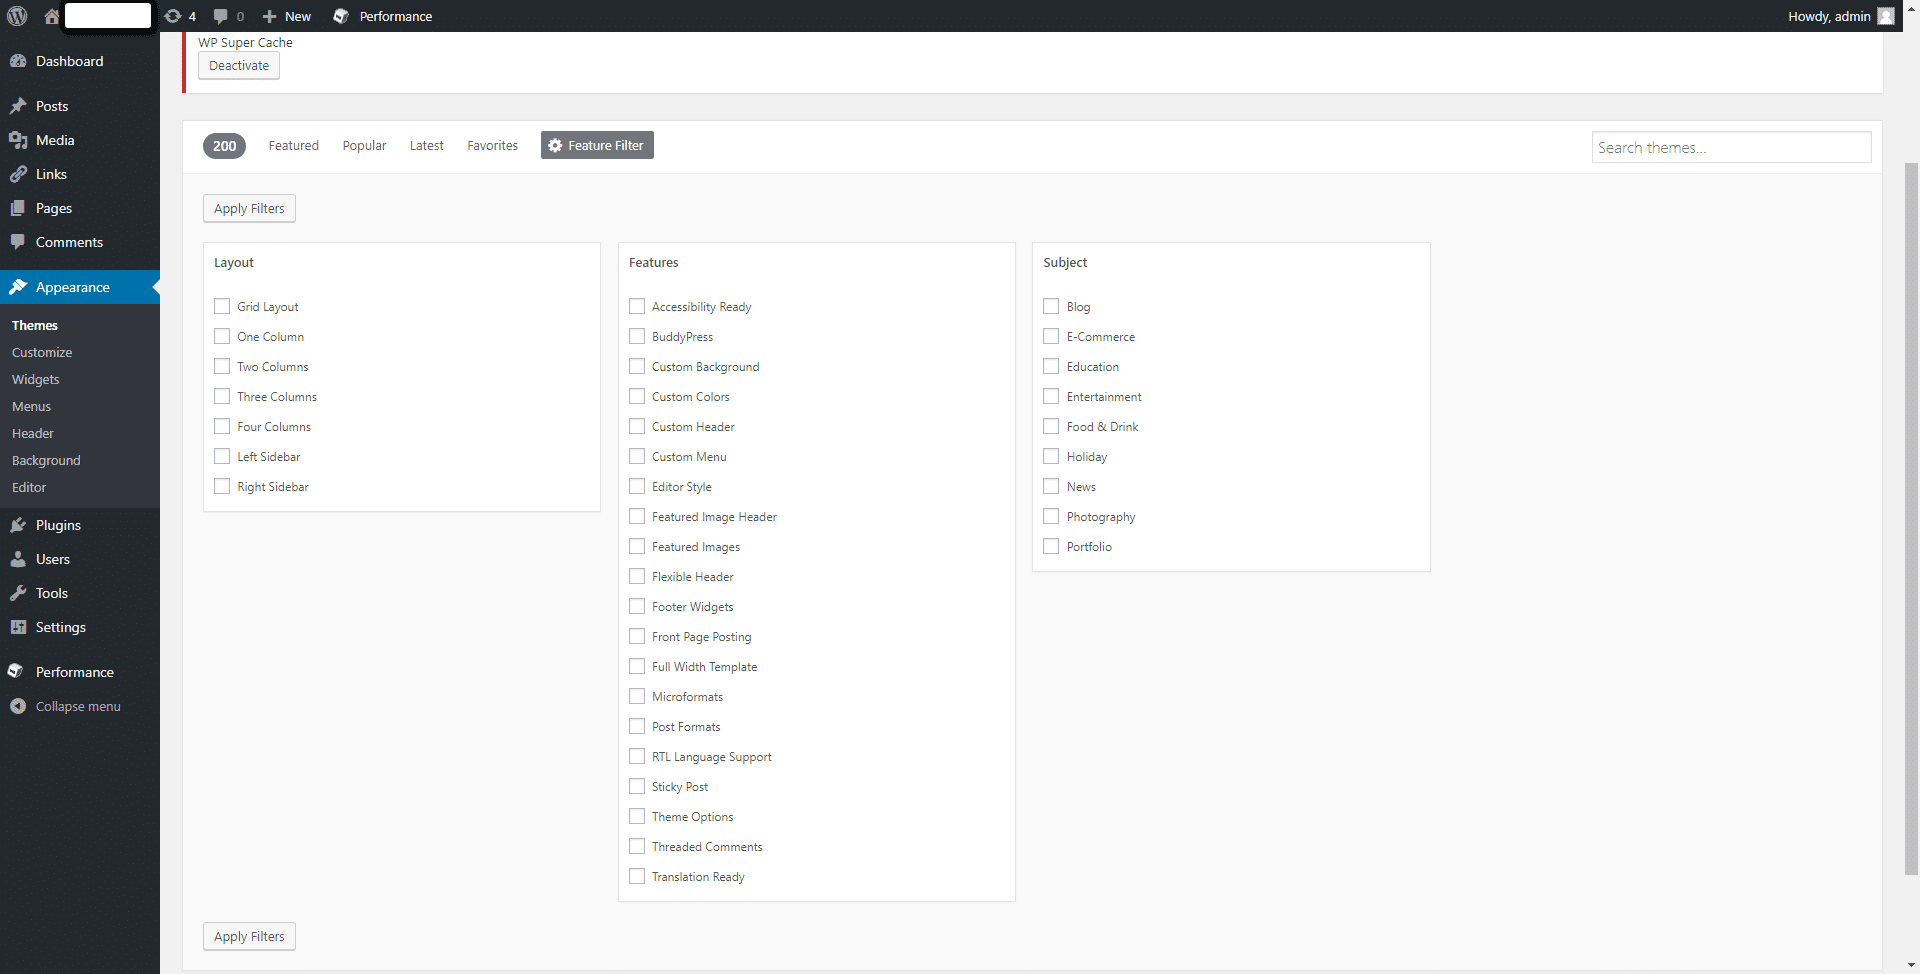
8th Step : Once you find the Theme you wish to use, simply roll your mouse over it and click on the ‘Install’ button.
9th Step : After you receive the message which states that the theme was ‘Successfully installed’, you may click the ‘Activate; button and use the theme.

10th step: This is everything you should need to know about how to install a WordPress theme from the Admin Dashboard.
We have hand-picked hosting, security, CMS and Linux guides for you;